
Easiest Way to Make Perfect No Bake Cheesecake Strawberries Raspberries Mirror Glaze
No Bake Cheesecake Strawberries Raspberries Mirror Glaze. Great recipe for No Bake Cheesecake Strawberries Raspberries Mirror Glaze. Cheesecake is always my favorite dessert. Because it's easy to make, light and delicious.
 This time I am going to make a cheesecake with red. Mix vanilla wafers, butter, and sugar together. In a large mixing bowl using an electric mixer, combine cream cheese and sweetened condensed milk until completely combined and smooth. You can cook No Bake Cheesecake Strawberries Raspberries Mirror Glaze using 21 ingredients and 11 steps. Here is how you achieve it.
Ingredients of No Bake Cheesecake Strawberries Raspberries Mirror Glaze
- You need of For the cheesecake:.
- You need 2 of packages/8 oz. each cream cheese softened (room temperature).
- You need 1 tsp of vanilla extract.
- It's of 1 tsp lemon juice.
- You need 7 gram of unflavored gelatin (I use 1 envelope Knox unflavored gelatin).
- Prepare of 1 cup boiling water.
- Prepare 1/2 cup of sugar.
- It's of For the crust:.
- Prepare of 2 cups graham crackers crumbs.
- Prepare 1/4 cup of melted butter.
- It's 1 tsp of sugar (optional).
- Prepare 5-6 of small strawberries.
- Prepare of For the strawberry raspberry mirror glaze:.
- Prepare of 1 cup strawberry juice.
- It's 1/2 cup of raspberry jam.
- You need 1/4 cup of or more sugar.
- It's of I tbsp unflavored gelatin.
- Prepare 3 tbsp of water.
- You need A few of drops of red food coloring.
- You need of For topping:.
- It's of Any fruits on your choice (I use strawberry, raspberry, blueberry, and fondant flowers).
Fold whipped cream into cream cheese mixture. Remove from oven and water;let cool to room temperature. In a small bowl, mix graham cracker crumbs and melted butter. Meanwhile, place cream cheese in the bowl of a stand mixer and beat until fluffy.
No Bake Cheesecake Strawberries Raspberries Mirror Glaze step by step
- For the crust: In a medium bowl add the graham crackers crumbs, melted butter, and sugar stir until well combined..
- Press the crumb mixture into removable springform pan (mine 7 inch), spreading evenly press flat..
- Cut the strawberries into thin slices about 3mm. Then arrange them around the side of the tin, with the flat side sitting against the crust base. Chill the crust in the refrigerator for at least 30 minutes or freezer in 10 minutes..
- To make the filling: in a small bowl mix gelatin and sugar, add boiling water and stir until gelatin is dissolved..
- In a large bowl beat cream cheese, vanilla extract and lemon juice with electric mixer on medium speed until creamy. Add gelatin mixture, continue beating until well blended after each addition..
- Refrigerate 45 minutes or until thickened, keep stirring every 15 minutes. Pour into pie crust then refrigerate for at least 3 hours or until firm..
- Now making the mirror glaze: In a small bowl add gelatin and water until the gelatin bloom..
- Place the strawberry juice, raspberry and sugar in a saucepan and bring to a simmer. Pour the gelatin mixture and few drops of red food coloring. Keep stirring until the gelatin is dissolved. Let cool to room temperature..
- Take out the cheesecake from the refrigerator, gently pour evenly the strawberry raspberry mixture over the cheesecake. Cover with plastic wrap and refrigerate for another 2-3 hours or until firm..
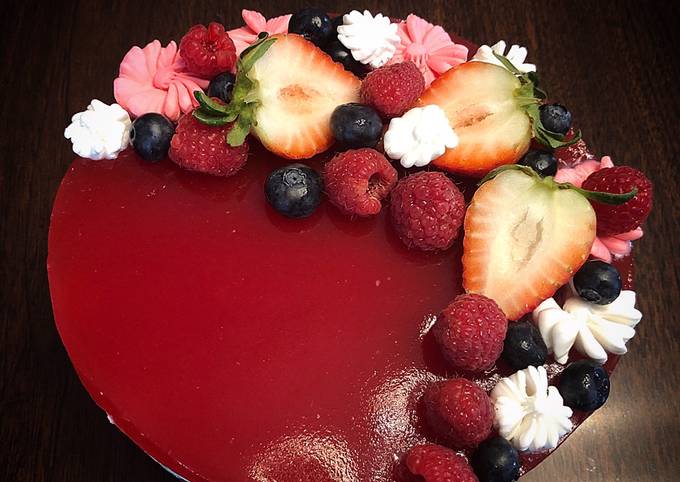
- When it’s ready to serve, unclasp side of pan and remove cheesecake. Topping with fresh berries or any fruit as your desired. Enjoy!.
- HappyCooking ❤️.
Drizzle in the sweetened condensed milk, lemon juice and vanilla. Scrape down the sides of the bowl as needed. Before adding the mirror glaze to your chocolate honeycomb cheesecake, place a cooling rank on top of a large baking tray. The glaze will drip down, and the tray will catch the excess. Place the cheesecake while still on the base or cake board onto the cooling rack centre.


